in this log, I will illustrate the deck planking. I checked out a number of different views and ways that folks out there accomplish this. the scale in which the planking is cut is also important. if you wish to keep the integrity of fact and scale in your build, they need to be cut in relation to scale. in a 1:50 scale build, planks have to be cut and staggered, so the scale relation relates to cutting them in 3 inches and 6inches long strips respectively......this equates to the real thing to be anywhere from 10 to 20 feet. keep in mind that i may be a bit off, for those who want exact figures, but these will put them in the ballpark. some of the builds that I looked at, put the plank butts every other plank. a trusted source that i spoke with suggested that I put them after every two planks, further staggering the butts and layering out the layout even more. I liked it! another thing that I did was when starting at the center, I put the staggers, opposite each other, so that it would appear to fan out across the deck. I started with the first batch by cutting them to the lengths, then staining them. I thought to keep them blonde, but what's the fun in that....I ask you.

as you can see here, the way i staggered them can be seen. looking at how small the batch would be, I decided to do them in sections....half of the ship first. soon I had them stained and ready for the finish. I had read somewhere, where a person used crayon to simulate the caulking. I thought it good to try here. One thing to mention, concerns the waterways I made......they were too thick for the deck planking supplied in the kit. this was something that I hadn't figured in.......shoot! the deck planking supplied in the kit, is about 1/16th of an inch thick......and I made the waterways from 1/8th raw stock! thankfully, I had some hull planking left over and there was enough to do the deck. I know it's not correct, but it got me out of a bind.......to late to turn back now!
I ended up robbing the black crayon from my grandson's pack that we keep here.....I'll get him some more later.....and outlined the batch of planking. once they were finished, they were laid down in the order in which they were intended.
while in the process of doing this, I thought about that cabin compartment. it should be done as well. I first installed a sill separation on the floor and then made up planking for it.
after I finished this, I made up the second batch, which was to cover the rest of the deck. the same process was performed on them as well. I started to itch again......paint on the hull......those words were dogging me. in between steps taken, I did a few more things to the hull, in preparation. soon , I was at an impasse, the second batch was drying. I used polyurethane as the top coat.....I have a few spray can of it and though it just as good as anything to use. you can also use lacquer as a clear coat. I took 'ole Nordie to the cellar.......to put to rest the nag in the back of my mind.
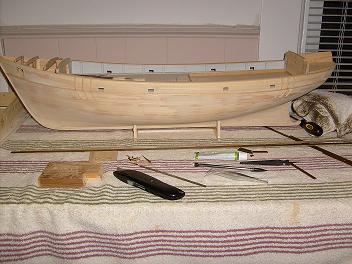
this is the inner sanctum, a place you might see in the future......if I start too many more projects and my wife gets sick of it.
this was just the primer coat, but it was just enough to quell the ghost that hounded me. now I will get to see the imperfections and repair them, before I put the finish coats on him. while he was drying in the cellar, I started what will be the next phase of the build, the pilot house. I had already started the lower section, but now the focus will be on the upper section and combining the two sections together. they will still be removable at this point, to be cemented into place at a later date. the hull still needs the finish coat and touch-up to the deck level. the top rail will be painted at this point and the bow hopefully will be done as well. the fruits of this log's labor produced the following.


as stated in a previous log, as the progress of the build goes, I'm keeping an eye out for areas that show gaps and such. looking at other builds of this ship and others like it, give light to this {to what I would call an imperfection} and hopefully keep it to a minimum. by keeping tolerances to a minimum and making subtle changes, you can keep this problem at bay and keep the body lines clean. until next time...............*